
วิธีเริ่มร้านค้าออนไลน์ด้วย Shopify: คำแนะนำทีละขั้นตอน
เผยแพร่แล้ว: 2023-05-14ครั้งแรกที่ฉันตั้งร้านค้าออนไลน์ ฉันจำได้ว่าฉันจ้องมองที่ผืนผ้าใบว่างเปล่าก่อนที่ฉันไม่รู้ว่าต้องเริ่มตรงไหน
ฉันทรมานกับการเลือกธีมที่สมบูรณ์แบบ ฉันเริ่มสร้างหน้าแรกก่อนที่จะเพิ่มสินค้าใดๆ และฉันใช้เวลามากมายในการพยายามทำสิ่งที่ผิดให้ถูกต้องก่อนที่จะเปิดตัว
เมื่อมองย้อนกลับไป ความผิดพลาดที่ฉันทำไม่ใช่เรื่องแปลกสำหรับมือใหม่ นั่นเป็นเหตุผลที่ฉันต้องการสร้างทรัพยากรประเภทที่ฉันหวังว่าจะมีเมื่อฉันเริ่มต้น—บทสรุปของการตัดสินใจทั้งหมดที่เกี่ยวข้องกับการตั้งค่าร้านค้าออนไลน์ที่พร้อมเปิดตัวบน Shopify ที่ทุกคนสามารถทำตามได้
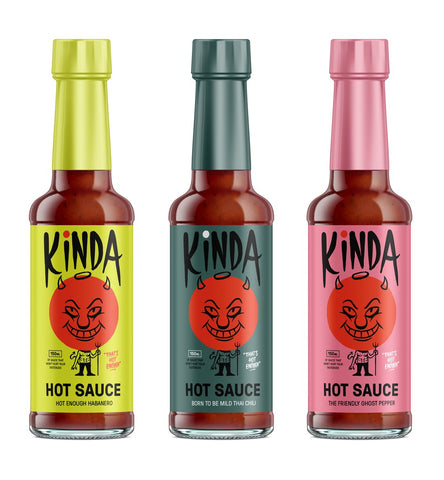
ตัวอย่างที่ฉันจะใช้ในคู่มือนี้คือร้านขายซอสร้อนอย่างง่ายตามภาพด้านล่าง ฉันจะเปิดม่านเพื่อแสดงให้คุณเห็นถึงความคิดที่เกี่ยวข้องกับการลงรายการสินค้า การออกแบบโฮมเพจ การเขียนคำโฆษณา การตั้งค่าการจัดส่ง และการตัดสินใจมากมายที่เกี่ยวข้องในการแปลแนวคิดธุรกิจเป็นร้านค้าออนไลน์
วิธีเริ่มต้นร้านค้าออนไลน์ (ตั้งแต่เริ่มต้น)
- เพิ่มสินค้าที่คุณต้องการขาย
- สร้างหน้าหลักสำหรับร้านค้าของคุณ
- เลือกธีมและปรับแต่งร้านค้าออนไลน์ของคุณ
- ปรับแต่งการตั้งค่าการจัดส่งของคุณ
- กำหนดการตั้งค่าภาษีของคุณ
- ตั้งค่าเกตเวย์การชำระเงินและการจ่ายเงินของคุณ
- เตรียมร้านค้าของคุณให้พร้อมสำหรับการเปิดตัว
- เปิดตัวร้านค้าของคุณ
เริ่มทดลองใช้ Shopify ฟรี
ก่อนที่เราจะเริ่มต้น คุณจะต้องเริ่มทดลองใช้ Shopify ฟรีก่อน การทดลองใช้งาน 14 วันควรให้เวลาคุณมากเพียงพอในการสร้างร้านค้าออนไลน์ที่พร้อมเปิดตัวหากคุณทำตามคำแนะนำนี้ และโปรดจำไว้ว่าคุณสามารถเพิ่มสินค้าและปรับปรุงร้านค้าของคุณต่อไปได้หลังจากที่เปิดให้ใช้งานจริง
เมื่อคุณเริ่มทดลองใช้ คุณจะได้รับแจ้งให้ป้อนชื่อร้านค้า ซึ่งจะกลายเป็น URL เริ่มต้นของคุณ (เช่น storename.myshopify.com) คุณจะไม่สามารถเปลี่ยนแปลงได้ แต่คุณจะสามารถซื้อโดเมนแบบกำหนดเองได้ (เช่น yourstore.com) ในภายหลัง ดังนั้นอย่ากังวลกับการเลือกชื่อที่สมบูรณ์แบบในตอนนี้
หลังจากตอบคำถามสองสามข้อ คุณจะพบว่าตัวเองอยู่ในบัญชี Shopify ของคุณเอง

ต่อไปนี้เป็นรายการตรวจสอบสั้นๆ ของสิ่งที่คุณควรมีก่อนที่จะเริ่มต้น และสิ่งที่ฉันจะร่วมมือด้วยเพื่อสร้างร้านค้าของฉัน:
- แนวคิดทางธุรกิจ เนื่องจากมีซอสร้อนหลายยี่ห้อคุยโวว่าเป็น "ซอสเผ็ดร้อนที่สุดเท่าที่เคยมีมา" ฉันจึงคิดว่าคงจะสนุกถ้าร้านตัวอย่างของฉัน Kinda Hot Sauce ขายซอสเผ็ดรสชาติเยี่ยมสำหรับคนกึ่งผจญภัย หากคุณยังไม่มีแนวคิดทางธุรกิจ คุณสามารถเรียกดูรายการแนวคิดทางธุรกิจของเราเพื่อเป็นแรงบันดาลใจ
- ชื่อธุรกิจ ฉันใช้ Namechk เพื่อตรวจสอบว่าแนวคิดชื่อธุรกิจของฉันมีอยู่ในโซเชียลและในฐานะโดเมนหรือไม่ก่อนที่จะตัดสินใจ เนื่องจากบาง URL ของ .com หาได้ยาก ฉันจึงเลือกใช้โดเมน kindahotsauce.shop ไม่รู้จะเรียกร้านของคุณว่าอะไร? เรียนรู้วิธีเลือกชื่อโดเมนหรือลองใช้โปรแกรมสร้างชื่อโดเมนฟรีของ Shopify
- โลโก้ ฉันทำงานร่วมกับนักออกแบบเพื่อสร้างโลโก้นี้สำหรับ "แบรนด์ผู้ท้าชิง" ที่ฉลาด ซุกซน กล้าได้กล้าเสีย และ เผ็ดร้อน (ลิ้นจุกแก้มสำหรับบริษัทซอสเผ็ดรสอ่อน) ฉันเตรียมไฟล์ .png ที่มีพื้นหลังโปร่งใส เพื่อให้ง่ายต่อการปรับขนาดโดยไม่สูญเสียคุณภาพ คุณสามารถทำตามคำแนะนำของเราเพื่อสร้างโลโก้ของคุณเองได้ฟรีหรือจ้างนักออกแบบ

- สินค้าที่จะขาย. คุณสามารถขายสินค้าที่จับต้องได้ สินค้าดิจิทัล หรือบริการในร้านค้า Shopify ของคุณ ผลิตภัณฑ์ของฉันไม่ใช่ของจริง แต่ฉันพยายามอย่างเต็มที่เพื่อทำให้เป็นจริง ฉันจะเพิ่มผลิตภัณฑ์สี่อย่างในร้าน Kinda Hot Sauce: Hot Enough Habanero, Born to Be Mild Thai Chilli, The Friendly Ghost Pepper และชุดซอสร้อนสามแพ็ค หากคุณยังไม่มีสินค้าที่จะขาย คุณสามารถอ่านคู่มือของเราเกี่ยวกับวิธีค้นหาไอเดียผลิตภัณฑ์ที่ทำกำไรหรือใช้หนึ่งในแอปจัดหาสินค้าที่มีอยู่มากมายบน Shopify
- ภาพถ่าย การถ่ายภาพผลิตภัณฑ์ที่สะอาดตาช่วยให้คุณก้าวไปข้างหน้าได้ดีที่สุด ฉันจะใช้แบบจำลองขวดซอสร้อนของฉันบนพื้นหลังสีขาว พร้อมกับภาพถ่ายสต็อกบางส่วนสำหรับภาพไลฟ์สไตล์ หากคุณมีงบจำกัด คุณสามารถถ่ายภาพสินค้าของคุณเองได้ แม้จะใช้เพียงกล้องของสมาร์ทโฟน หรือใช้ภาพถ่ายสต็อกฟรีจนกว่าคุณจะสามารถถ่ายภาพไลฟ์สไตล์ในแบบของคุณเองได้
เคล็ดลับ : หากคุณไม่แน่ใจว่าจะต้องดำเนินการที่ใดใน Shopify หรือต้องการนำทางไปยังตำแหน่งที่ตั้งใดตำแหน่งหนึ่งอย่างรวดเร็ว คุณสามารถใช้แถบค้นหาอัจฉริยะของ Shopify เพื่อไปยังสินค้า หน้าเพจ หรือการตั้งค่าที่ต้องการได้โดยตรง

1. เพิ่มผลิตภัณฑ์ของคุณ
ร้านค้าออนไลน์ที่ไม่มีอะไรให้ซื้อคืออะไร? การเพิ่มผลิตภัณฑ์ควรเป็นหนึ่งในสิ่งแรกที่คุณทำ เนื่องจากผลิตภัณฑ์ของคุณคือสิ่งที่คุณจะออกแบบรูปลักษณ์และความรู้สึกของเว็บไซต์ของคุณ
ในร้านค้า Shopify ใหม่ของคุณ ให้ไปที่ สินค้า > เพิ่มสินค้า เพื่อสร้างรายการสินค้ารายการแรกของคุณ

มีการตัดสินใจหลายอย่างที่เราจะทำในหน้านี้ ดังนั้นเราจะแบ่งออกเป็นขั้นตอนต่างๆ
เขียนชื่อผลิตภัณฑ์และคำอธิบายของคุณ
หน้าผลิตภัณฑ์เป็นที่ที่ลูกค้าเข้าไปเรียนรู้เกี่ยวกับผลิตภัณฑ์และตัดสินใจว่าจะซื้อหรือไม่ รายละเอียดมีความสำคัญ และการแบ่งปันข้อมูลที่ถูกต้องด้วยวิธีที่เหมาะสม ตั้งแต่การกำหนดราคาไปจนถึงขนาด ผ่านข้อความหรือภาพ สามารถสร้างความแตกต่างได้ทั้งหมด หากคุณไม่แน่ใจว่าจะรวมสิ่งใด คุณสามารถดูร้านค้าออนไลน์อื่นๆ ในตลาดของคุณเพื่อเป็นแรงบันดาลใจ
ชื่อผลิตภัณฑ์ ของคุณควรทำให้ชัดเจนว่าผลิตภัณฑ์คืออะไร นี่คือสิ่งที่ลูกค้าจะเห็นเมื่อพวกเขาเรียกดูร้านค้าของคุณและสิ่งที่จะช่วยให้พวกเขาพบสิ่งที่ต้องการในแค็ตตาล็อกของคุณ พยายามทำให้สั้นลงและใช้คำอธิบายสินค้าหรือรายละเอียดปลีกย่อย (เพิ่มเติมในภายหลัง) เพื่อแสดงข้อมูลเฉพาะหรือตัวเลือกสินค้าอื่นๆ เช่น สีหรือขนาด
สำหรับชื่อผลิตภัณฑ์แรกของเรา เราจะใช้ชื่อซอสร้อนหลักของเราคือ Hot Enough Habanero
คำอธิบายผลิตภัณฑ์ อธิบายและขายผลิตภัณฑ์ของคุณ พวกเขายังเป็นแหล่งบล็อกของนักเขียนทั่วไป ข่าวดีก็คือคุณไม่จำเป็นต้องเป็นนักเขียนคำโฆษณามืออาชีพเพื่อเขียนคำอธิบายผลิตภัณฑ์ที่น่าสนใจ คุณเพียงแค่ต้อง:
- รู้ว่าคุณกำลังพูดอยู่กับใคร ลองนึกถึงสิ่งที่ลูกค้าของคุณต้องรู้เพื่อให้รู้สึกมั่นใจในการซื้อผลิตภัณฑ์ของคุณ และพยายามสื่อสารในคำอธิบายของคุณ
- เน้นสิ่งจูงใจ คุณมีนโยบายการคืนสินค้าที่ดีหรือการจัดส่งฟรีหรือไม่? ผลิตภัณฑ์ของคุณเป็นมิตรกับสิ่งแวดล้อมหรือไม่? พิจารณาว่าฟีเจอร์ ประโยชน์ และข้อเสนอใดมีความสำคัญจริงๆ แล้วตัดทิ้งไป ร้านค้าจำนวนมากผสมข้อความและไอคอนเพื่อสื่อสารจุดขายเหล่านี้อย่างรวดเร็วบนหน้าผลิตภัณฑ์ของตน
- คาดการณ์คำถามทั่วไปหรือการคัดค้าน อะไรอาจทำให้ลูกค้าลังเลที่จะซื้อ? กลัวซื้อผิดไซส์? พวกเขาจำเป็นต้องรู้หรือไม่ว่าผลิตภัณฑ์ของคุณทำมาจากอะไรในกรณีที่มีอาการแพ้? พวกเขาจำเป็นต้องรู้หรือไม่ว่าผลิตภัณฑ์ของคุณผลิตอย่างมีจริยธรรม?
- ทำให้ข้อความของคุณง่ายต่อการสแกน ทำให้คำอธิบายของคุณอ่านง่ายขึ้นด้วยย่อหน้าสั้นๆ หัวข้อย่อย หัวข้อย่อย ข้อความตัวหนา ฯลฯ จากนั้นถามตัวเองว่าผู้เยี่ยมชมสามารถดึงข้อมูลที่ต้องการได้เร็วเพียงใด
- ช่วยให้ลูกค้าเห็นว่าตัวเองกำลังใช้ผลิตภัณฑ์ของคุณ ลูกค้าไม่สามารถลิ้มรส รู้สึก สัมผัส หรือทดลองผลิตภัณฑ์ของคุณได้ นอกจากภาพถ่ายสินค้าแล้ว คุณสามารถทำให้สินค้าของคุณมีชีวิตขึ้นมาได้ด้วยการระบุวัสดุที่คุณใช้ รวมถึงแผนภูมิขนาด หรือแบ่งปันเรื่องราวเกี่ยวกับวิธีการสร้างสินค้า ทั้งหมดนี้ขึ้นอยู่กับสินค้าของคุณ
สำหรับผลิตภัณฑ์อย่างซอสเผ็ด เราสามารถสันนิษฐานได้อย่างมั่นใจว่าลูกค้าใส่ใจในรายละเอียดต่อไปนี้เป็นพิเศษเมื่อทำการซื้อ: ส่วนผสม รสชาติ ปริมาณ ความเผ็ด และสิ่งที่เข้ากันได้ดี ดังนั้นฉันจึงพยายามอย่างดีที่สุดเพื่อให้ผู้เยี่ยมชมร้านค้าของฉันสามารถเข้าถึงข้อมูลทั้งหมดนี้ได้อย่างรวดเร็ว

อัพโหลดรูปภาพสินค้าหรือสื่ออื่นๆ
ในส่วน สื่อ ของหน้าผลิตภัณฑ์ของคุณ คุณสามารถอัปโหลดสื่อภาพที่ช่วยให้คุณแบ่งปันรายละเอียดที่สมบูรณ์ยิ่งขึ้นเกี่ยวกับผลิตภัณฑ์ของคุณ: ภาพถ่าย, GIF, วิดีโอ หรือแม้แต่โมเดล 3 มิติ
การนำเสนอสร้างความแตกต่าง ช่วยให้ลูกค้าจินตนาการถึงการเป็นเจ้าของผลิตภัณฑ์ของคุณ ช่วยให้พวกเขาเห็นการทำงานหรือแสดงอย่างภาคภูมิใจในพื้นที่ของพวกเขา ต่อไปนี้เป็นจุดที่ต้องจำ:
- ใช้ภาพถ่ายคุณภาพสูงที่ทำให้ผลิตภัณฑ์ของคุณอยู่ในสภาวะแสงที่ดีที่สุด หลีกเลี่ยงภาพที่พร่ามัวหรือมีความละเอียดต่ำ
- พยายามรักษาสัดส่วนภาพให้เท่ากัน (เช่น อัตราส่วนระหว่างความกว้างและความสูง) ในรูปภาพสินค้าของคุณ เพื่อให้รูปภาพทั้งหมดของคุณมีขนาดเท่ากัน ความสม่ำเสมอนี้ทำให้ร้านค้าของคุณดูสะอาดตาและเป็นมืออาชีพมากขึ้น

- หากคุณมีงบจำกัด สมาร์ทโฟนสมัยใหม่ส่วนใหญ่สามารถถ่ายภาพสินค้าคุณภาพสูงได้ และคุณสามารถใช้เครื่องมือแก้ไขภาพฟรีเพื่อปรับแต่งภาพ (เช่น remove.bg ซึ่งช่วยให้คุณลบพื้นหลังได้ฟรี)
- หลังจากอัปโหลดรูปภาพแล้ว คุณสามารถคลิกที่รูปภาพเพื่อทำการแก้ไขพื้นฐาน เช่น การครอบตัดและปรับขนาด คุณยังสามารถแก้ไขข้อความแสดงแทนสำหรับการเข้าถึงเพื่ออธิบายรูปภาพของคุณกับบุคคลที่มองไม่เห็น ตัวอย่างเช่น ฉันได้เขียน "Hot Enough Habanero by Kinda Hot Sauce ขนาด 150 มล." เพื่อช่วยทุกคนที่มีปัญหาทางการมองเห็นในร้านค้ากับฉัน
ฉันจะใช้รูปถ่ายขวดซอสร้อนรูปเดียวบนพื้นหลังสีขาว แต่สำหรับผลิตภัณฑ์ที่ลูกค้าอาจต้องการข้อมูลที่เป็นภาพมากขึ้น เช่น เสื้อผ้าหรือเครื่องประดับ การใช้ภาพถ่ายหลายๆ ภาพที่มีมุมหรือรายละเอียดเพิ่มเติมสามารถช่วยปรับปรุงความไว้วางใจของลูกค้าได้

กำหนดราคาของคุณ
ตอนนี้ได้เวลากำหนดราคาลงรายการสินค้าของคุณแล้ว นี่คือสิ่งที่ลูกค้าจะจ่ายเพื่อซื้อสินค้าของคุณ
หรือ คุณสามารถใช้ฟิลด์ เปรียบเทียบราคา เพื่อสื่อสารว่าผลิตภัณฑ์โดยทั่วไปจะมีราคาเท่าใด โดยเฉพาะอย่างยิ่งในกรณีของการขาย ตัวอย่างเช่น หากเราต้องการประหยัดเงินในการซื้อซอสเผ็ด 3 แพ็ค เราสามารถป้อนราคาดั้งเดิมของ 3 ขวดที่นี่ อย่างไรก็ตาม ฉันขอเตือนว่าอย่าใช้สิ่งนี้โดยไม่มีเหตุผลที่ดี โดยเฉพาะอย่างยิ่งหากคุณขายผลิตภัณฑ์ระดับพรีเมียม เพราะอาจทำให้คุณภาพที่เห็นได้ราคาถูกลง
นอกจากนี้ ฟิลด์ ต้นทุนต่อรายการ ยังเป็นทางเลือกอีกด้วย หากคุณต้องการ คุณสามารถใช้มันเพื่อติดตามอัตรากำไรของคุณสำหรับแต่ละผลิตภัณฑ์ ในแผน Shopify หรือสูงกว่า วิธีนี้ช่วยให้คุณติดตามผลกำไรในรายงานกำไรของคุณได้

แม้ว่าจะมีข้อยกเว้นบางประการ แต่ธุรกิจที่ขายสินค้าและบริการจะต้องเก็บภาษีทุกครั้งที่มีคนสั่งซื้อจากพวกเขา ดังนั้นเราจะทำเครื่องหมายที่ช่องนั้นและกำหนดการตั้งค่าภาษีของเราในภายหลัง
เพื่อให้เข้าใจง่ายๆ เราจะถือว่าต้นทุนต่อผลิตภัณฑ์ของฉัน หรือต้นทุนในการผลิตและบรรจุขวดหนึ่งขวดคือ 5 ดอลลาร์ ถ้าฉันขายขวดละ 15 ดอลลาร์ ฉันจะทำกำไรได้ดีซึ่งเหลือที่ว่างสำหรับส่วนลดและการตลาด
ผลิตภัณฑ์ | ต้นทุนต่อผลิตภัณฑ์ | ราคา | อัตรากำไรขั้นต้น | น้ำหนัก |
Habanero ร้อนพอ | $5 | $15 | 66% | 0.5 ปอนด์ |
เกิดมาเพื่ออ่อนโยน | $5 | $15 | 66% | 0.5 ปอนด์ |
พริกไทยผีที่เป็นมิตร | $5 | $15 | 66% | 0.5 ปอนด์ |
คินดะ ฮอทซอส 3 แพ็ค | $15 | $40 | 63% | 1.5 ปอนด์ |
ในความเป็นจริง การกำหนดราคาไม่ค่อยจะตรงไปตรงมานัก ตัวแปรหลายอย่างสามารถมีอิทธิพลต่อการกำหนดราคาสินค้าของคุณ เช่น ค่าจัดส่ง วัตถุดิบ ค่าใช้จ่าย เช่น ค่าเช่าหรือพนักงาน ต้นทุนของเวลา และที่สำคัญที่สุดคือคุณภาพของผลิตภัณฑ์ของคุณ
เคล็ดลับ : อย่าคิดว่าราคาที่ต่ำกว่าจะส่งผลให้มียอดขายเพิ่มขึ้น ลูกค้ามักใช้ราคาเป็นทางลัดในการประเมินคุณภาพ หากคุณกำลังขายสินค้าระดับพรีเมียม อย่ากลัวที่จะตั้งราคาสินค้าดังกล่าว โดยเฉพาะอย่างยิ่งหากคุณสามารถพิสูจน์ได้ด้วยการสร้างแบรนด์ที่ดึงดูดใจและเป็นมืออาชีพ
คุณสามารถทบทวนและปรับราคาของคุณตามสิ่งที่คุณเรียนรู้หลังจากเริ่มทำการตลาดได้เสมอ คุณอาจค้นพบว่าลูกค้ายินดีจ่ายมากขึ้นสำหรับผลิตภัณฑ์ของคุณ หรือคุณอาจพบวิธีที่สร้างสรรค์ในการลดต้นทุนและเพิ่มมูลค่าเฉลี่ยของทุกคำสั่งซื้อที่คุณได้รับ
รายการสิ่งของ
หากเราทำการดรอปชิปหรือใช้บริการพิมพ์ตามสั่ง เราไม่จำเป็นต้องติดตามสินค้าคงคลัง แต่เนื่องจาก Kinda Hot Sauces ผลิต ขาย และจัดส่งซอสร้อนของตัวเอง เราจึงต้องการติดตามสินค้าคงคลังใน Shopify เพื่อทราบว่าเราเหลือซอสแต่ละชนิดอยู่เท่าไร และต้องผลิตอีกเท่าไรเมื่อมีคำสั่งซื้อเข้ามา
หากนี่เป็นครั้งแรกที่คุณขายของออนไลน์ คุณอาจเห็นคำศัพท์ที่ไม่คุ้นเคยบางคำที่นี่ ดังนั้นเราจะดำเนินการอย่างรวดเร็ว
- SKU. หน่วยเก็บสต็อกใช้เพื่อติดตามและจัดการสินค้าคงคลังของคุณสำหรับผลิตภัณฑ์และตัวเลือกสินค้าเฉพาะ สร้างระบบที่สอดคล้องกันโดยใช้ตัวเลขหรือตัวอักษรที่ช่วยให้คุณระบุรายการที่แน่นอนได้ง่ายๆ ในทันที (เช่น MHS-HEH บอกฉันว่าเป็นซอสเผ็ดปานกลาง Hot Enough Habenero)
- บาร์โค้ด. โดยทั่วไปแล้ว บาร์โค้ด (ISBN, UPC, GTIN ฯลฯ) จะใช้ในกรณีที่คุณขายต่อผลิตภัณฑ์หรือต้องการเพิ่มบาร์โค้ดที่สแกนได้ให้กับสินค้าเพื่อให้จัดการสินค้าคงคลังได้ง่ายขึ้น ตอนนี้เราปล่อยว่างไว้ได้เพราะเราผลิตและขายผลิตภัณฑ์ของเราเอง
- ปริมาณ. นี่คือจำนวนผลิตภัณฑ์เฉพาะที่คุณมีอยู่ หากคุณมีสถานที่หลายแห่งที่มีสินค้าคงคลังและตั้งค่าไว้ใน Shopify สถานที่เหล่านั้นจะแสดงที่นี่ ในกรณี จากตัวอย่างของฉัน ฉันเริ่มต้นด้วยชุดเล็กๆ 10 ขวดสำหรับซอสร้อนแต่ละอัน และใช้พื้นที่ของฉันเองเพื่อเก็บสินค้าคงคลัง

เนื่องจากใช้เวลาไม่นานในการสร้างผลิตภัณฑ์เพิ่ม ฉันจึงสามารถเปิด "ขายต่อไปเมื่อสินค้าหมด" แต่คุณสามารถปิดตัวเลือกนี้และทำเครื่องหมายสินค้าเป็น "สินค้าหมด" ได้หากสินค้าคงคลังของคุณมีจำกัดหรือใช้เวลานานขึ้นในการเติมสินค้า
การส่งสินค้า
ในส่วนการจัดส่ง คุณจะป้อนรายละเอียดที่จะคำนวณอัตราค่าจัดส่งโดยอัตโนมัติและพิมพ์ฉลากการจัดส่งที่เหมาะสมสำหรับแต่ละคำสั่งซื้อ
สำหรับร้าน Kinda Hot Sauce ของฉัน เราจะทำเครื่องหมายที่ “เป็นสินค้าที่จับต้องได้” และป้อนข้อมูลต่อไปนี้:
- น้ำหนัก. น้ำหนักของขวดเดียว ฉันจะป้อน 0.5 ปอนด์
- ข้อมูลศุลกากร นี่เป็นสิ่งสำคัญหากคุณวางแผนที่จะขายในต่างประเทศ เราจะใส่ "แคนาดา" เนื่องจาก Kinda Hot Sauce ผลิตและจัดส่งจากแคนาดา และใช้แถบค้นหาเพื่อค้นหารหัส Harmonized System สำหรับเครื่องปรุงรส ซึ่งก็คือ 21309
การตั้งค่าค่าจัดส่งตามจริงและตัวเลือกที่คุณจะเสนอให้กับลูกค้าของคุณจะอยู่ในบทช่วยสอนนี้ในภายหลัง

ตัวแปร
ฉันจะไม่ตั้งค่าตัวเลือกสินค้าสำหรับสินค้าของฉัน แต่ฉันยังต้องการอธิบายว่าเจ้าของร้านค้า Shopify จำนวนมากตั้งค่าอย่างไร
หากสินค้าของคุณมีตัวเลือกต่างๆ เช่น ขนาดหรือสี แทนที่จะเพิ่มแต่ละรายการเป็นผลิตภัณฑ์ของตนเอง คุณสามารถเพิ่มเป็นตัวเลือกสินค้าของผลิตภัณฑ์เดียวกันได้ ตัวแปรแต่ละรายการสามารถมีรูปภาพ ราคา สินค้าคงคลังที่ติดตาม และการตั้งค่าแต่ละรายการที่เกี่ยวข้อง
เมื่อใช้ตัวเลือกสินค้า คุณสามารถเพิ่มตัวเลือกสินค้าเพิ่มเติมได้ เช่น เสนอหลายสีในขนาดต่างๆ

เมื่อคุณเพิ่มตัวเลือกสินค้าให้กับสินค้าของคุณและกดบันทึกเพื่อรีเฟรชหน้า ส่วน สื่อ การกำหนดราคา สินค้าคงคลัง และ การจัดส่ง ที่เรากล่าวถึงข้างต้นจะต้องตั้งค่าสำหรับตัวเลือกสินค้าแต่ละรายการ
เนื่องจากผลิตภัณฑ์ของเรามีขนาดเดียวและไม่มีรายละเอียดปลีกย่อยใดๆ เราจะละเว้นส่วนนี้ไว้ตามลำพัง หากคุณขายตัวเลือกสินค้าที่แตกต่างกันของผลิตภัณฑ์เดียวกัน อย่าลืมแก้ไขตัวเลือกสินค้าแต่ละรายการด้วยข้อมูลหน้าสินค้าที่เหมาะสม ตัวอย่างเช่น รูปภาพเสื้อยืดสีส้มสำหรับตัวเลือกสีส้มหากคุณเสนอสีที่ต่างกัน

องค์กรและความพร้อมใช้งานของผลิตภัณฑ์
ในส่วนองค์กร คุณสามารถติดป้ายกำกับผลิตภัณฑ์ของคุณเพื่อช่วยจัดกลุ่มเข้าด้วยกัน และทำให้ง่ายต่อการจัดการแคตตาล็อกผลิตภัณฑ์ของร้านค้า จัดการผลิตภัณฑ์ให้ลูกค้าเลือกซื้อ และใช้กฎหรือส่วนลดกับผลิตภัณฑ์เฉพาะ ต่อไปนี้คือความหมายของป้ายกำกับแต่ละรายการ:
- ความพร้อมใช้งานของผลิตภัณฑ์: คุณสามารถเลือกจากช่องทางการขายมากมาย เช่น Facebook Shops หรือ Amazon เพื่อแสดงรายการผลิตภัณฑ์ของคุณ ซึ่งเราจะพูดถึงในภายหลัง ในตอนนี้ เพียงตรวจสอบให้แน่ใจว่าสินค้าของคุณมีจำหน่ายใน “ร้านค้าออนไลน์” มิฉะนั้นจะถูกซ่อนไว้
- ประเภทสินค้า. หมวดหมู่ผลิตภัณฑ์ที่คุณสามารถใช้เพื่อระบุผลิตภัณฑ์บางอย่าง (เช่น เสื้อยืด) แต่ละผลิตภัณฑ์สามารถมีผลิตภัณฑ์ได้เพียงประเภทเดียวเท่านั้น เราจะใช้แค่ "ซอสร้อน"
- ผู้ขาย นี่คือผู้ผลิต ผู้ค้าส่ง หรือผู้ขายบุคคลที่สามสำหรับผลิตภัณฑ์ คุณสามารถกรองรายการสินค้าของคุณตามผู้ขาย ซึ่งสามารถเพิ่มความเร็วในการสั่งซื้อสินค้าคงคลัง Kinda Hot Sauce เป็นผู้ผลิต ดังนั้นเราจะระบุว่าเป็นผู้ขาย
- แท็ก แท็กเป็นคำหลักที่คุณสามารถเชื่อมโยงกับผลิตภัณฑ์ของคุณได้ คุณสามารถเพิ่มแท็กหลายแท็กให้กับสินค้าหนึ่งๆ เพื่อช่วยให้ลูกค้าค้นพบสินค้านั้นผ่านแถบค้นหาของร้านค้าออนไลน์ของคุณ คุณยังสามารถใช้แท็กเพื่อดำเนินการอัตโนมัติในร้านค้าของคุณ เช่น การเพิ่มสินค้าที่มีแท็กเฉพาะไปยังคอลเลกชันเฉพาะ ฉันจะเว้นว่างไว้เนื่องจากฉันยังไม่มีเหตุผลที่จะใช้แท็ก
- คอลเลกชัน ของสะสมมีความสำคัญ ช่วยให้คุณสามารถจัดระเบียบและดูแลผลิตภัณฑ์ของคุณสำหรับวัตถุประสงค์และผู้ชมที่เฉพาะเจาะจง ตัวอย่างเช่น แบรนด์เครื่องแต่งกายอาจสร้างคอลเลกชันตามผลิตภัณฑ์สำหรับผู้หญิง ผลิตภัณฑ์สำหรับผู้ชาย การลดราคาช่วงฤดูร้อน หรือสินค้ามาใหม่ สินค้าชนิดเดียวกันสามารถรวมอยู่ในหลายคอลเลกชันได้ เราจะตั้งค่าคอลเลกชันของเราหลังจากที่เราได้เพิ่มผลิตภัณฑ์เพิ่มเติม

แสดงตัวอย่างรายชื่อเครื่องมือค้นหา
การแสดงตัวอย่างรายการเครื่องมือค้นหาเป็นที่ที่คุณสามารถปรับแต่งลักษณะที่หน้าเว็บปรากฏในผลลัพธ์ของเครื่องมือค้นหา นอกจากนี้ยังเป็นที่ที่คุณสามารถปรับปรุงการค้นพบผลิตภัณฑ์ของคุณผ่านเครื่องมือค้นหาเช่น Google
หากคุณรู้ว่าคำหลักใดที่ลูกค้าเป้าหมายของคุณใช้เพื่อค้นหาผลิตภัณฑ์ที่เหมือนกับของคุณ คุณสามารถใช้คำหลักเหล่านั้นในส่วนนี้เพื่อเพิ่มโอกาสในการปรากฏในผลลัพธ์ของเครื่องมือค้นหาเมื่อเวลาผ่านไป
ฉันใช้ Ubersuggest ซึ่งเป็นเครื่องมือวิจัยคีย์เวิร์ดฟรี เพื่อประเมินว่าผู้คนค้นหาคีย์เวิร์ดที่เกี่ยวข้องกับผลิตภัณฑ์ของฉันบ่อยเพียงใด ฉันเห็น "ซอสฮาบาเนโร" (ค้นหา 5,400 ครั้งต่อเดือน) และ "ซอสเผ็ดเล็กน้อย" (ค้นหา 590 ครั้งต่อเดือน) และ "ซอสเผ็ดปานกลาง" (ค้นหา 50 ครั้งต่อเดือน) เป็นคำหลักที่ฉันอาจต้องการใช้ในหน้าผลิตภัณฑ์ของฉัน

เราจะลงลึกเกี่ยวกับ SEO ในภายหลัง แต่ต่อไปนี้คือเคล็ดลับสั้นๆ บางส่วนสำหรับการเพิ่มประสิทธิภาพส่วนนี้ในระหว่างนี้:
- ชื่อหน้า. เขียนชื่อหน้าของคุณเพื่อให้มีคำหลักเป้าหมายของคุณในขณะที่ยังคงสั้นและอธิบายได้ดีพอที่จะคลิก ฉันจะเน้นไปที่ "ซอสเผ็ดปานกลาง" เนื่องจากมีความเกี่ยวข้องกับผลิตภัณฑ์นี้มากที่สุด ตั้งเป้าหมายไว้ที่ต่ำกว่า 60 อักขระหากคุณทำได้ เพื่อไม่ให้ถูกตัดออกจากผลการค้นหา ฉันจะใช้ “Hot Enough Habanero | ซอสร้อนปานกลาง” เป็นชื่อเพจของฉัน
- คำอธิบาย. ใช้พื้นที่นี้เพื่อแสดงข้อมูลที่น่าสนใจซึ่งอาจโน้มน้าวให้ผู้ค้นหาคลิกผ่านเมื่อเห็นลิงก์ไปยังผลิตภัณฑ์ของคุณในผลการค้นหาหรือบนโซเชียลมีเดีย ฉันพยายามทำให้สั้นและกระชับในขณะที่ขยายข้อมูลที่นำเสนอในชื่อหน้าของฉัน
- URL และหมายเลขอ้างอิง รักษาความเรียบง่าย ไม่ซ้ำใคร และมีความหมายสำหรับผู้ที่ใช้เครื่องมือค้นหาเพื่อค้นหาผลิตภัณฑ์ของคุณ ฉันจะใช้ “https://www.shopify.com/hot-enough-habanero”
เมื่อเสร็จแล้ว เราสามารถกดบันทึกและดูตัวอย่างหน้าผลิตภัณฑ์ของเราเพื่อดูว่ามีลักษณะอย่างไร เราสามารถเปลี่ยนรายละเอียดเล็กๆ น้อยๆ เช่น สีและฟอนต์ได้ในภายหลังเมื่อเราเริ่มปรับแต่งร้านค้าของเรา
คุณสามารถทำขั้นตอนนี้ซ้ำสำหรับสินค้าแต่ละรายการที่คุณต้องการเพิ่มในร้านค้าของคุณ ในขณะที่จำไว้ว่าคุณไม่จำเป็นต้องเพิ่มสินค้าทั้งหมดของคุณเพื่อเปิดตัว
การจัดระเบียบผลิตภัณฑ์ของคุณเป็นคอลเลกชัน
ตอนนี้เรามีสินค้าอย่างน้อย 2-3 รายการอยู่ในรายการแล้ว เราสามารถเริ่มจัดระเบียบสินค้าเหล่านั้นเป็นคอลเลกชั่นภายใต้ สินค้า > คอลเลกชั่น ใน Shopify
สามารถสร้างคอลเลกชันเพื่อดูแลจัดการผลิตภัณฑ์เพื่อกำหนดเป้าหมายผู้ชมเฉพาะ (เช่น ผลิตภัณฑ์สำหรับเด็ก) ธีม (เช่น สินค้าขายดี) หรือหมวดหมู่ผลิตภัณฑ์ (เช่น เครื่องประดับ) คุณสามารถตัดสินใจได้ว่าคุณต้องการเพิ่มสินค้าไปยังคอลเลกชั่นใดคอลเลกชันหนึ่งด้วยตนเอง หรือทำให้สินค้ารวม/ไม่รวมโดยอัตโนมัติตามราคา แท็ก หรือเงื่อนไขอื่นๆ
คอลเลกชันมีจุดประสงค์ที่หลากหลาย เช่น:
- การดึงสินค้าบางรายการที่คุณต้องการให้แสดงในส่วนของหน้าแรกของคุณ
- การเชื่อมโยงไปยังคอลเลกชันของผลิตภัณฑ์ในการนำทางของคุณหรือในหน้าแรกของคุณเพื่อช่วยให้ผู้ชมที่แตกต่างกันนำทางไปยังแคตตาล็อกของคุณได้อย่างรวดเร็ว
- คัดสรรสินค้าที่คุณต้องการวางขาย (คุณสามารถใช้ส่วนลดกับคอลเลกชั่นสินค้าเฉพาะได้)
สำหรับตอนนี้ ฉันจะสร้างคอลเลกชันสำหรับซอสร้อนปานกลางของเรา นั่นเป็นเพราะฉันต้องการรวมเฉพาะผลิตภัณฑ์ซอสร้อนสามชิ้นของฉันเท่านั้น โดยไม่รวมชุดรวมสามแพ็ค ด้วยวิธีนี้ ฉันจึงสามารถอวดรสชาติแต่ละอย่างและเน้นชุดแยกได้
ฉันจะกรอกชื่อคอลเลกชั่นและคำอธิบายตามวิธีที่ฉันต้องการทักทายผู้เยี่ยมชมเมื่อพวกเขาเข้ามาที่หน้าคอลเลกชั่นนี้ การแสดงตัวอย่างเครื่องมือค้นหาสามารถกรอกข้อมูลได้โดยใช้แนวทางปฏิบัติที่ดีที่สุดแบบเดียวกับที่เราปฏิบัติตามสำหรับหน้าผลิตภัณฑ์ คุณยังสามารถตั้งค่ารูปภาพคอลเล็กชัน ซึ่งจะถูกดึงเพื่อแสดงคอลเล็กชันของคุณเมื่อเราปรับแต่งรูปลักษณ์ของร้านค้าออนไลน์ของคุณ

2. สร้างหน้าหลักสำหรับร้านค้าออนไลน์ของคุณ
จนถึงตอนนี้ เราได้มุ่งเน้นไปที่ผลิตภัณฑ์ แต่ร้านค้าออนไลน์ของคุณต้องทำมากกว่าแค่มีสินค้าให้ซื้อ ต้องช่วยให้ผู้ซื้อเข้าใจธุรกิจของคุณ ให้เหตุผลในการไว้วางใจคุณ และให้รายละเอียดที่จำเป็นอื่นๆ แก่ลูกค้าที่กำลังมองหาพวกเขา
คุณสามารถสร้างเพจส่วนใหญ่เหล่านี้ได้ที่ ร้านค้าออนไลน์ > เพจ
คุณไม่จำเป็นต้องเตรียมทุกหน้าให้พร้อมสำหรับการเปิดตัว แต่บางหน้าที่มีประโยชน์ที่สุดในการสร้าง ได้แก่:
- ติดต่อเพจ . หน้านี้ช่วยให้ลูกค้ามีวิธีที่ชัดเจนในการติดต่อคุณหากมีคำถามหรือชี้ให้พวกเขาไปยังสถานที่เพื่อหาคำตอบ เช่น หน้าคำถามที่พบบ่อย
- เกี่ยวกับเพจ . หน้า About เชื่อมต่อกับลูกค้าเป็นการส่วนตัว อธิบายรูปแบบธุรกิจของคุณ และ/หรือแบ่งปันเหตุผลที่คุณเริ่มต้นธุรกิจของคุณ หน้าเกี่ยวกับที่โน้มน้าวใจสามารถช่วยให้ร้านค้าออนไลน์ใหม่ๆ ไว้วางใจได้
- หน้าคำถามที่พบบ่อย หน้าคำถามที่พบบ่อยช่วยบรรเทาคำถามที่พบบ่อยเกี่ยวกับการสนับสนุนลูกค้าบางส่วน
- หน้านโยบาย มีหน้าทางกฎหมายบางหน้าที่ลูกค้าคาดหวังและสามารถช่วยปกป้องคุณในกรณีที่มีข้อโต้แย้ง เช่น นโยบายการคืนสินค้าและนโยบายความเป็นส่วนตัว ที่คุณสามารถตั้งค่าได้ในการตั้งค่า > กฎหมาย
สำหรับร้านค้าของเราและเพื่อจุดประสงค์ของบทช่วยสอนนี้ เราจะพูดถึงวิธีสร้างหน้าเกี่ยวกับ (เรียกว่า “เรื่องราวของเรา”) หน้าติดต่อ และหน้านโยบายสำคัญ (นโยบายความเป็นส่วนตัว นโยบายการจัดส่ง และข้อกำหนดในการให้บริการ) แต่คุณสามารถสร้างเพจใดก็ได้ที่คุณคิดว่าจะช่วยให้คุณได้รับความไว้วางใจจากลูกค้า
เกี่ยวกับเพจ
เกี่ยวกับเพจเป็นวิธีที่ยอดเยี่ยมในการโอบรับ "ขนาดเล็ก" ในธุรกิจขนาดเล็ก และได้รับความไว้วางใจในฐานะร้านค้าใหม่
คุณสามารถมีวิดีโอแนะนำตัวคุณในฐานะผู้ก่อตั้ง ลิงก์ไปยังรางวัลและการพูดถึงจากสื่อมวลชน รูปภาพที่อธิบายห่วงโซ่อุปทานของคุณ หรือใส่อะไรก็ได้ที่ช่วยให้หน้านี้บอกลูกค้าของคุณว่าคุณเป็นใครและเกี่ยวข้องกับอะไร
สำหรับ Kinda Hot Sauce เราจะสร้างหน้า About ที่เรียบง่าย ซึ่งเขียนเหมือนจดหมายถึงลูกค้าที่อธิบายปรัชญาและเหตุผลในการเริ่มต้นธุรกิจของเรา
เมื่อมีคนมาเยี่ยมชมร้านค้าของฉันและพวกเขาขายไม่ออกเมื่อทำการซื้อ ฉันต้องการให้พวกเขาพบกับข้อความที่น่ารักและกินใจ หากพวกเขาเลือกที่จะเยี่ยมชมหน้าเกี่ยวกับของฉันเพื่อเรียนรู้เพิ่มเติม
เนื่องจากเราจะใช้ข้อความเป็นส่วนใหญ่ ฉันจะใช้ตัวเลือกการจัดรูปแบบที่มีอยู่ในแถบเครื่องมือเพื่อทำให้สำเนาดูสะดุดตายิ่งขึ้น 
เช่นเดียวกับที่คุณทำกับผลิตภัณฑ์ของคุณ คุณควรปรับแต่งส่วน แสดงตัวอย่างรายการเครื่องมือค้นหา ของหน้าของคุณตามสิ่งที่คุณต้องการให้ URL เป็น และลักษณะที่คุณต้องการให้หน้าปรากฏในผลลัพธ์ของเครื่องมือค้นหา
ติดต่อเพจ
หน้าติดต่อของคุณคือสิ่งที่ลูกค้ามองหาเพื่อถามคำถามหรือรับการสนับสนุน
ธีม Shopify ส่วนใหญ่ให้คุณสร้างได้อย่างง่ายดาย เพียงสร้างเพจใหม่ ไปที่ส่วน เทมเพลต ทางด้านขวา แล้วเลือกเทมเพลตผู้ติดต่อ สิ่งนี้ควรเพิ่มแบบฟอร์มในหน้าของคุณ จากนั้นคุณสามารถเขียนคำแนะนำเพื่อช่วยให้ลูกค้าติดต่อหรือลิงก์ออกไปยังหน้าอื่นๆ เช่น คำถามที่พบบ่อย เพื่อช่วยผู้ซื้อในการแก้ปัญหาของตนเองก่อน 
นอกจากนี้ยังมีแอปแชทสดที่คุณสามารถติดตั้งเพื่อให้ผู้ซื้อเข้าถึงการสนับสนุนได้มากขึ้น
หน้านโยบาย
หน้านโยบายเป็นแนวทางปฏิบัติมาตรฐานสำหรับธุรกิจออนไลน์ พวกเขาให้ลูกค้าของคุณเข้าใจว่าคุณดำเนินธุรกิจอย่างไรและคาดหวังอะไรจากคุณ นอกจากนี้ยังช่วยปกป้องคุณในกรณีที่ลูกค้ามีข้อโต้แย้ง
ภายใต้ การตั้งค่า > กฎหมาย ใน Shopify คุณจะสามารถสร้างเทมเพลตที่คุณสามารถปรับแต่งให้สอดคล้องกับธุรกิจและกฎหมายท้องถิ่นของคุณ:
- นโยบายการคืนสินค้า. นโยบายของคุณเกี่ยวกับการคืนสินค้าและการแลกเปลี่ยนคืออะไร? ลูกค้าต้องดำเนินการคืนสินค้านานแค่ไหน? สินค้าต้องอยู่ในสภาพใด? นโยบายการคืนสินค้าที่ดีสามารถช่วยให้ลูกค้าซื้อสินค้าจากคุณได้อย่างมั่นใจ
- นโยบายความเป็นส่วนตัว. นโยบายความเป็นส่วนตัวอธิบายถึงวิธีที่คุณรวบรวมข้อมูลเกี่ยวกับลูกค้าของคุณ
- เงื่อนไขการให้บริการ. นโยบายข้อกำหนดในการให้บริการของคุณเป็นข้อตกลงระหว่างคุณและลูกค้าของคุณโดยระบุถึงวิธีที่คุณจะดำเนินการและสิทธิ์ที่คุณสงวนไว้
- นโยบายการจัดส่งสินค้า. นโยบายการจัดส่งช่วยให้คุณกำหนดความคาดหวังของลูกค้าเกี่ยวกับต้นทุนการจัดส่ง เวลาในการผลิต และความเร็วในการจัดส่งสำหรับภูมิภาคที่คุณจัดส่ง
(โปรดทราบว่าเทมเพลตเหล่านี้ไม่ใช่คำแนะนำทางกฎหมายและควรปรับให้เข้ากับร้านค้าของคุณ)
3. ปรับแต่งร้านค้าออนไลน์ของคุณ
ตอนนี้เรามีสินค้าบางอย่างในร้านค้าของเราและบางหน้าพร้อมจำหน่ายแล้ว ก็ถึงเวลาไปที่ ร้านค้าออนไลน์ > ธีม ใน Shopify และเริ่มคิดว่าเราต้องการให้เว็บไซต์ของเรามีลักษณะอย่างไร
เลือกธีม
ขั้นตอนแรกคือการเลือกธีม: เทมเพลตที่เราติดตั้งในร้านค้าของเราที่เราสามารถใช้เป็นจุดเริ่มต้นในการออกแบบเว็บไซต์ของเรา Shopify Theme Store เป็นศูนย์รวมของทั้งธีมฟรีและแบบเสียเงิน โดยแต่ละธีมจะมีชุดสไตล์และฟีเจอร์เป็นของตัวเอง

บางธีมสร้างขึ้นสำหรับแคตตาล็อกผลิตภัณฑ์ขนาดใหญ่ ในขณะที่ธีมอื่นมีไว้สำหรับธุรกิจผลิตภัณฑ์เดียว ส่วนอื่นๆ ทำขึ้นสำหรับบางอุตสาหกรรมหรือบางประเภทธุรกิจ เช่น ธีมด่วนสำหรับร้านอาหาร
ต่อไปนี้เป็นประเด็นสำคัญที่ควรพิจารณาเมื่อเลือกธีมที่สมบูรณ์แบบ:
- แต่ละธีมมาพร้อมกับสไตล์ที่หลากหลาย ดังนั้นอย่าลืมเลือกซื้อธีมและสไตล์ตามขนาดของแคตตาล็อกสินค้าและความสวยงามที่คุณต้องการสำหรับร้านค้าของคุณ
- พิจารณาว่าธีมที่คุณกำลังดูมีฟีเจอร์ในตัวที่คุณต้องการหรือไม่ เช่น แถบค้นหาที่เติมคำค้นหาอัตโนมัติหรือส่วนที่แสดงการกล่าวถึงสื่อ โปรดทราบว่าคุณสามารถค้นหาแอป Shopify ทั้งแบบฟรีและแบบชำระเงินที่เพิ่มฟังก์ชันเพิ่มเติมให้กับร้านค้าของคุณ
- อย่าเลือกธีมจากสีหรือแบบอักษร นี่คือทุกสิ่งที่คุณสามารถปรับแต่งได้ในภายหลัง คุณยังสามารถทำให้ธีมของคุณไม่เหมือนใครได้ด้วยการจ้างผู้เชี่ยวชาญของ Shopify เพื่อปรับแต่งธีมให้คุณ
- คุณสามารถทดลองใช้และธีมแบบชำระเงินได้ก่อนที่จะซื้อโดยมีค่าธรรมเนียมเพียงครั้งเดียว
- เหนือสิ่งอื่นใด โปรดทราบว่าคุณไม่ได้ยึดติดกับธีมที่คุณเลือก หากคุณเปลี่ยนใจในภายหลัง คุณสามารถดูตัวอย่างธีมอื่น ติดตั้งในร้านค้าปัจจุบันของคุณ และปรับแต่งได้โดยไม่ต้องสร้างสินค้าหรือเพจใหม่
หลังจากเล่นกับธีมฟรีสองสามอย่างเช่น Debut และ Narrative ฉันก็จำกัดขอบเขตให้แคบลงเหลือ Brooklyn (สไตล์ขี้เล่น) เพราะ Kinda Hot Sauce มีสายผลิตภัณฑ์ขนาดเล็กและไม่ต้องการคุณสมบัติมากมายในการเปิดด้วยเท้าขวา ฉันชอบเลย์เอาต์สมัยใหม่ของตารางผลิตภัณฑ์ ความเรียบง่ายของเมนูการนำทาง และการที่บรู๊คลินให้ความสำคัญกับการสร้างแบรนด์ด้วยภาพ
ออกแบบหน้าแรกของคุณ
แต่ละธีมประกอบด้วยส่วนต่างๆ ที่คุณสามารถจัดเรียงใหม่ เพิ่ม ลบ หรือซ่อนชั่วคราว ส่วนต่างๆ สามารถช่วยตัดสินใจเกี่ยวกับการนำเสนอหน้าแรกของร้านค้าและลองใช้รูปแบบต่างๆ ได้
เมื่อพิจารณาการออกแบบโฮมเพจของคุณ ให้คิดถึงเป้าหมายที่โฮมเพจต้องทำให้สำเร็จ และพิจารณาว่าจะใช้เป้าหมายนั้นกับธุรกิจเฉพาะของคุณอย่างไร:
- จัดลำดับความสำคัญของผู้เข้าชมครั้งแรกและช่วยให้พวกเขาเข้าใจได้อย่างรวดเร็วว่าธุรกิจของคุณคืออะไรและขายอะไร
- รองรับผู้เยี่ยมชมที่กลับมาและทำให้พวกเขานำทางไปยังผลิตภัณฑ์และหน้าเว็บที่พวกเขากำลังมองหาได้ง่าย
- พยายามสร้างความสนใจในผลิตภัณฑ์ของคุณและเชื่อมั่นในธุรกิจของคุณในทุก ๆ การเลื่อนดู
- สร้างเส้นทางที่ชัดเจนให้ผู้เยี่ยมชมใช้ตามความตั้งใจที่จะซื้อ คุณอาจเน้นหน้าเกี่ยวกับเราสำหรับผู้ที่ต้องการเรียนรู้เพิ่มเติมเกี่ยวกับธุรกิจของคุณ หรือคอลเล็กชันต่างๆ ของคุณ เพื่อให้ผู้เข้าชมเลือกผลิตภัณฑ์ที่พวกเขาสนใจได้ด้วยตนเอง
- ออกแบบหน้าแรกของคุณโดยสมมติว่าผู้เยี่ยมชมของคุณจำนวนมากจะเรียกดูบนโทรศัพท์มือถือของตน
คุณจะกลับไปเยี่ยมชมและปรับปรุงหน้าแรกของคุณเมื่อเวลาผ่านไป อย่าปล่อยให้การแสวงหาความสมบูรณ์แบบขัดขวางคุณจากการก้าวไปข้างหน้ากับการเปิดตัวของคุณ
สำหรับ Kinda Hot Sauce ฉันจะใช้ส่วนเหล่านี้เพื่อทำสิ่งต่อไปนี้:
- สไลด์โชว์ (ด้วยสไลด์เดียว) เพื่อดึงดูดความสนใจในทันทีด้วยสำเนาอันชาญฉลาดที่อธิบายว่าทำไมนี่ไม่ใช่แบรนด์ซอสเผ็ดทั่วไปของคุณ “ไม่ใช่ซอสเผ็ดที่ร้อนแรงที่สุดในโลก” ทำลายความคาดหวังในขณะที่สื่อสารว่าแบรนด์ของฉันเกี่ยวกับอะไรด้วยสโลแกน “เครื่องเทศที่ดี” ฉันได้เพิ่มการซ้อนทับและเพิ่มความทึบของการวางซ้อนเพื่อให้แน่ใจว่าข้อความของฉันชัดเจนเมื่อ ti แสดงบนรูปภาพของฉัน
- คอลเลกชันที่โดดเด่น เพื่อแสดงซอสร้อนสามแบบที่แตกต่างกันในคอลเลกชันซอสเผ็ดปานกลางที่ฉันทำไว้ก่อนหน้านี้ ฉันจะขยายความประทับใจที่เกิดขึ้นในสไลด์โชว์ด้วยข้อความที่เป็นตัวหนาเกี่ยวกับผลิตภัณฑ์ของฉัน: "ซอสเผ็ดที่อร่อยไม่จำเป็นต้องเป็นอันตรายถึงชีวิต"
- รูปภาพพร้อมข้อความ เพื่อสรุปตำแหน่งแบรนด์ของฉันและแสดงเหตุผลที่ร้านค้าของฉันมีลิงก์ไปยังหน้าเกี่ยวกับ ตอนนี้ฉันจะใช้โลโก้เป็นรูปภาพ แต่คุณสามารถใช้รูปภาพของคุณ ผู้ก่อตั้ง หรือรูปภาพที่แสดงถึงแบรนด์ของคุณได้เป็นอย่างดี
- จดหมายข่าว เพื่อดึงดูดผู้คนให้เข้าร่วมรายการอีเมลของฉัน ไม่ใช่ทุกคนที่มาที่ร้านของฉันจะพร้อมที่จะซื้อ ด้วยการเสนอเหตุผลให้พวกเขาเลือกรับรายชื่ออีเมลของฉัน (สูตรเผ็ดเล็กน้อยในกรณีนี้) ฉันสามารถสร้างรายชื่ออีเมลของฉันได้เมื่อเริ่มกระตุ้นให้คนเข้าชมร้านค้าของฉัน
- สินค้าแนะนำ เพื่อ เน้นชุดซอสร้อน 3 แพ็คของฉัน (และส่วนลดที่พวกเขาจะได้รับ) ให้กับลูกค้าที่ไม่แน่นอน ฉันใส่สิ่งนี้ไว้สุดท้ายเพื่อเสนอเส้นทางสุดท้ายในการซื้อสำหรับลูกค้าที่เลื่อนไปที่ส่วนท้ายของหน้าแรกของฉันโดยไม่คลิกอะไรเลย
อย่างไรก็ตาม ในอนาคต ฉันสามารถขยายหน้าแรกของฉันเพื่อรวมส่วนที่อธิบายว่า "ร้อนพอ" ได้อย่างไร หรือบล็อกโพสต์แกลเลอรีแบ่งปันสูตรอาหารที่เกี่ยวข้องกับซอสเผ็ดของฉัน ฉันจะไม่ทราบแน่ชัดว่าการตัดสินใจที่ฉันทำบนหน้าแรกของฉันนั้นถูกต้องหรือไม่จนกว่าฉันจะเริ่มทำการตลาด แต่ฉันรู้สึกดีกับเค้าโครงนี้
เมื่อคุณออกแบบโฮมเพจของคุณเอง ให้จัดลำดับความสำคัญของข้อมูลอย่างไร้ความปรานี น้อยมักจะมาก แทนที่จะพยายามยัดเยียดข้อมูลลงในหน้าแรกของคุณให้มากที่สุด ให้นำผู้เข้าชมไปยังหน้าสนับสนุนที่ช่วยขายพวกเขาเพิ่มเติมในธุรกิจของคุณ หรืออธิบายข้อมูลที่ไม่จำเป็น
ปรับแต่งเมนูนำทางของคุณ
ส่วน หัว คือส่วนที่คุณจะเปลี่ยนแปลงพื้นที่บนสุดของร้านค้าออนไลน์ของคุณ ซึ่งรวมถึงเมนูนำทาง รถเข็น และโลโก้ของคุณ
เราจะเน้นไปที่การสร้างเมนูการนำทางที่ชัดเจนเป็นส่วนใหญ่ เพราะนี่คือวิธีที่ผู้คนจะค้นหาเส้นทางไปยังส่วนต่างๆ ของเว็บไซต์ของคุณ
มีสามรูปแบบหลักของการนำทางที่คุณสามารถตั้งค่าในส่วนหัว:
- การนำทางหลัก นี่คือเมนูด้านบนสุดที่คุณสามารถจัดลำดับความสำคัญของเส้นทางการนำทางหลักที่คุณต้องการนำเสนอแก่ลูกค้า คุณสามารถสร้างเมนูย่อย (เช่น เมนูแบบเลื่อนลง) ภายใต้แต่ละรายการเพื่อหลีกเลี่ยงความยุ่งเหยิง
- การนำทางส่วนท้าย นี่คือที่ที่คุณเก็บลิงก์ไปยังหน้าที่ไม่จำเป็นซึ่งอาจเบี่ยงเบนความสนใจของผู้เข้าชมรายใหม่ แต่ยังคงต้องมีไว้สำหรับผู้ที่ต้องการค้นหา นักช้อปออนไลน์ส่วนใหญ่จะดูข้อมูลที่นี่ เช่น นโยบายการคืนสินค้าหรือหน้าติดต่อ
- ค้นหา. คุณสามารถเปิดใช้แถบค้นหาในส่วนหัวเพื่อช่วยให้ผู้เยี่ยมชมไปยังสิ่งที่พวกเขากำลังมองหาได้โดยตรง สิ่งนี้มีประโยชน์อย่างยิ่งหากคุณมีแคตตาล็อกผลิตภัณฑ์ขนาดใหญ่และมีหลายหน้าบนเว็บไซต์ของคุณ
คุณคงไม่อยากทำให้ผู้คนล้นหลามด้วยตัวเลือกมากมายตั้งแต่แรกเริ่ม แต่คุณสามารถจัดระเบียบการนำทางของคุณเพื่อจัดลำดับความสำคัญของการกระทำที่คุณ ต้องการให้ ผู้เข้าชมดำเนินการ โดยเน้นไปที่การช้อปปิ้ง
One menu item can have multiple dropdown levels to gradually feed visitors more options based on what they're looking for. For example, you can group multiple Collections under one menu item focused on products for women—that way you don't immediately overwhelm men who shop with you with options that aren't for them.
For Kinda Hot Sauce, I'm going to create a simple navigation structure where I:
- Surface my medium hot sauce Collection and 3-pack bundle under a “Shop” menu item.
- Nestle my Our Story and FAQ pages under an About menu item.
- Include my Contact page, for now, knowing that I can move it to the Footer in the future if I come up with another menu item that serves my goals better.
I'll also be creating another menu for my Footer to surface my non-essential policy pages at the bottom section of my website.
Tip : You can create a dropdown menu without linking out to a page by entering a # under Link instead of a URL and dragging any submenu items you want to include under it.
Set your colors, typography, and other theme settings
Colors and typography play a big role in your online store's visual identity. Under the Theme Settings tab in the online store editor, you'll be able to customize the look and feel of your overall online store, including colors and typography.
Even if you're not a designer, you can still pick font and color pairings you feel good about using the following tips.
For colors
- Consider the psychology of color and how different colors make people feel (eg, red makes people feel hungry, yellow suggests safety, and purple can have a royal quality to it).
- Use contrast to highlight important features of your homepage, such as buttons.
- Use a tool like Coolors to cycle through different color palettes to find colors you like and their associated hex code.
- Don't be afraid to go with your gut or just keep it simple if you're in doubt (even if it's just a simple black and white color scheme).
I came up with the following color palette for Kinda Hot Sauce because I want it to look bold and colorful. I probably won't end up using all of them, but I have enough to mix and match to find a combination I like:
- #392B58
- #FF0035
- #F7EE7F
- #654597
- #574AE2
Typography
- Try to pick two fonts (a maximum of three) to use across your store.
- Choose a body font that is easy to read (sans serif fonts like Helvetica are generally easier to scan on a screen).
- Use a tool like FontJoy to experiment with different font pairings.
For our store, we'll be keeping it simple with two fonts:
- Headings : Lora
- Accent text : Roboto
- Body text : Roboto
Tip : While you're in your Theme Settings, you can set a Favicon (usually your logomark), which is the icon that will display in browser tabs, bookmarks, and other locations. If you look at the tab of this page, you'll see the Shopify logo. That's our favicon.
Customize your checkout
Under Theme Settings , you can also customize the look of your checkout. At the very least, it's a good idea to add your logo to your checkout to give it a branded feel.
If you need to, you can also customize how your checkout works by clicking through to your checkout settings (or going to Settings > Checkout ).

Here's a quick rundown of the choices you can make regarding your checkout:
- Customer accounts. You can choose whether you want customers to create an account at checkout. This can be useful if you're running a wholesale or members-only store. We'll be disabling it for our store since we don't want to introduce unnecessary friction to our checkout experience.
- Customer contact. You can let customers choose how they want to be contacted by you after placing an order (email or SMS text messages). I'll select “Customers can only check out with email” for now to keep it simple and focus on building an email list I can market to.
- Form options. Here you can decide whether extra information like a first name or company name is hidden, optional, or required at checkout. Since we don't need all this information to fulfill every order for Kinda Hot Sauce, I'm going to make most of them optional.
- Order processing. You can find options to streamline the ordering process or add an additional confirmation step. To save customers some time, we'll use the customer's shipping address as the billing address by default and enable autocomplete for addresses.
- Email marketing. You can build your email list as you build your customer list by letting customers sign up during checkout. Since email is a key pillar in many online marketing strategies, we'll make sure this is turned on so we can sell our hot sauce to potential and existing customers on our email list.
- Abandoned checkouts. When a customer reaches your checkout and decides not to complete their purchase (it can happen for any number of reasons), you can set up an automated reminder email for these shoppers. We'll set up our automated email to go out 10 hours after someone abandons their checkout, while our store is still fresh in their minds and they may have more time to reconsider their purchase.
When in doubt, prioritize choices that reduce the friction of checking out for the majority of your customers.
Ask for feedback
Feedback is a gift, especially when you've been spending so much time working on your online store. Fresh eyes can often spot areas to improve that you don't and provide invaluable insights you can use to make tweaks to your store.
By default, your store is password-protected, but you can give people the password to check it out. You can find your password (or change it) under Online Store > Preferences .
Some other great places to go for feedback include:
- People close to you who you can rely on to give honest, constructive feedback
- Subreddits that your target customers may subscribe to
- Facebook groups
- The Shopify Community's Feedback On My Store forum
When I shared Kinda Hot Sauce for feedback, the following areas were mentioned to focus on for improvement:
- The copywriting on my product pages could be more focused on who my brand is for (responsible hot sauce lovers).
- A few people called out how “charming” the About page was and how it made people want to buy from this business. I could carry this charisma into the rest of my copywriting and campaigns when I start marketing.
Take both the good and the bad with a grain of sale as you incorporate feedback into your store. The best form of feedback you'll get is when you start actively marketing your business.
4. Set up shipping
Shipping can be one of the most complex considerations involved in running an ecommerce business. Between product weights, packaging costs, shipping destinations, carrier rates, and your potential profit per order, there are a lot of variables to juggle.
Luckily, we can boil it down to a few main approaches, which you can even blend together depending on the unique needs of your business, to find a shipping strategy that works for you:
- Offer free shipping. Free shipping can be an effective incentive for customers to shop with you, whether it's applied to certain products, order amounts (eg, if they spend over $50), or regions of the world. Keep in mind that you will need to factor this into the retail price of your products if you plan on absorbing the cost of shipping on behalf of your customers.
- Charge real-time carrier rates. Shopify integrates in real-time with various carriers like USPS and Canada Post to generate shipping options and live pricing. This allows your customers to choose the exact service and price they want. You can take advantage of discounted rates through Shopify Shipping.
- Charge a flat rate. Flat rate shipping works best when your products have similar sizes and weights, making actual shipping expenses easier to predict.
- Offer local pickup/delivery. You can also give local customers the option to pick up their online order at one of your locations, setting specific notification settings, pickup instructions, and other details for each location.
For more advice on creating a shipping strategy, you can read our Beginner's Guide to Ecommerce Shipping and Fulfillment. Remember that, like most of what we've done so far, this is something you can revisit and adjust over time.
For Kinda Hot Sauce, since it's located in Canada, we're going to set up our shipping in the following way to illustrate some of the various approaches you can take:
- An $8 flat rate to ship to Canada and the United States
- Free shipping to Canada/the United States when you spend $30 or more
- Real-time carrier rates for the rest of the world
About Shopify Shipping: With Shopify Shipping, you can get discounted rates, print shipping labels in Shopify, and manage order fulfillment all in one place.
Setting up our shipping zones
You can implement your shipping strategy under Settings > Shipping in Shopify. Here, you'll be able to create shipping zones where you can set your rates for shipping to customers in certain countries.

Setting conditional shipping rates
Within the shipping zone we just created, we can use the Add rate button to create specific rates based on certain conditions. For example, we can offer free shipping based on the condition that an order reaches a certain value threshold. Or we can increase the shipping rate if the order exceeds a certain weight.
Generally, you can save time and money on shipping while making more per sale by encouraging customers to add more items to their order. So we'll use free shipping on orders over $30 (two bottles of hot sauce or the three-pack bundle) as an incentive for customers to spend more.

Setting up real-time calculated shipping rates
Real-time shipping rates are based on the shipping details you entered when adding your products and package dimensions on the Settings > Shipping page. Customers can then choose their preferred service and rate at checkout.
You can also adjust these rates to include a handling fee to account for extra costs, like packaging or your time, on top of the courier service's rates.

5. Set up taxes
As a business that sells goods or services, you have to collect taxes to send to the government each time someone orders from your store (some exceptions apply, such as for digital goods in many jurisdictions).
Shopify will help you automatically handle most tax calculations using default sales tax rates around the world. Even so, it's a good idea to conduct some research or ask a tax professional to ensure you're charging the correct amount of sales tax.
You can override the default tax settings if there are specific requirements for your region, such as taxes for specific products or for shipping.
Go to Settings > Taxes in Shopify to set up your tax regions. Here you can edit the default rates if you like, or apply overrides if specific conditions apply in your region or to your products.
Since Kinda Hot Sauce operates in Canada, we'll set up our default tax rates for Canada. If you have a tax number you can enter it here or you can do so later. You'll be able to see how much tax you've collected under Analytics > Reports .

None of this should be taken as tax advice and you should consult with a tax professional if you're uncertain about your tax situation. Shopify doesn't file or remit your sales taxes for you.
6. Setting up payment gateways and payouts
We're in the final stretch! Next up is deciding how your store will accept payments and how you as a store owner will get paid.
Go to Settings > Payments to set up your payment provider. Shopify has made it easy to start accepting all major forms of payment with Shopify Payments. As long as you operate your business in one of the supported countries and aren't considered a prohibited business, you can activate Shopify Payments in just one click and pay 0% in extra transaction fees. You can also choose from over 100 third-party payment providers here or offer your customers additional payment options, such as PayPal.
In my case, I'll Complete Account Setup for Shopify Payments by entering my business and banking information. I can also Manage my settings for Shopify Payments and do things like:
- Choose the payment options I want to offer, like different credit cards (eg, Visa), and accelerated one-click payment options like Apple Pay and Shop Pay. Shop Pay is Shopify's one-click payment option that lets any customer of any store with Shop Pay enabled save their payment information for future purchases.
- Sell in multiple currencies, which will automatically convert your prices into the customer's currency if you enable it. Since we're selling mostly in Canada and the US, we'll add the US dollar and the Canadian dollar to our enabled currencies.
- Set your payout schedule. You can receive your payout daily, weekly, or monthly—it all depends on your preferences when it comes to your cash flow.
- Toggle extra fraud prevention measures such as CVV and postal code verification to add an extra layer of security.
- Customize how you appear on your customer's bank statements. We'll use KINDAHOTSAUCE to make our brand recognizable to customers on their credit card statements.
The currency you sell your products in can be set under Settings > General . I'm going to be selling in US dollars since it will be familiar for both US and Canadian customers.
7. Prepare your store for launch
With all the work we've done so far, we could actually launch our store now if we wanted to. We would just disable the password protection under Online Store > Preferences , which is the final step to flip the open sign and let people in to start buying our products.
In fact, if you're in a rush to go live, you could skip some or all the following steps and revisit them later when you have time.
But in this tutorial, I'm going to ensure that my store not only makes a strong first impression and offers a smooth customer experience at launch, but is also in a good place for me to start marketing.
That said, here are the final steps we'll be going over:
- Adding a custom domain
- Installing relevant sales channels
- (Optional) Customizing your email/SMS notifications
- Setting up your store for marketing (tracking and analytics)
Adding a custom domain
Buying a domain is like claiming land on the internet. That's why it's called a “web address.”
A custom domain is a fully branded URL that replaces the default URL that was created based on the store name you chose at setup (eg, you could buy yourstore.com to replace yourstore.myshopify.com as your public URL).
Under Online Store > Domains , you can buy your domain directly through Shopify in a matter of seconds, or you can transfer your domain from another registrar and connect it to your store.
Since the .com is taken, I'll be buying the .shop extension for KindaHotSauce through Shopify. KindaHotSauce.shop is now my store's URL.

Installing relevant sales channels
One of the advantages of using Shopify to power your business is that your online store is just one of many sales channels you can use to sell your products. You can connect your products to additional sales channels to meet your customers where they are, while keeping track of your products, inventory, and reporting in the same Shopify account so you always know what's going on in your business.
While you don't need to connect all of them right away, it's good to have them in mind when you're ready to explore new ways to get your products in front of the right shoppers.
Not every sales channel will be relevant for your unique business, but here are some that are worth highlighting:
- Shopify POS. Our point-of-sale solution for accepting in-person payments and easily syncing physical retail sales with your online Shopify store and inventory.
- Social networks. You can sell your products through a Facebook Shop on your Facebook page, product tags in your Instagram posts, Pinterest, and more.
- Marketplaces. Many shoppers start their purchasing journey on marketplaces like Amazon or eBay.
- Google channel. Google is the most popular search engine in the world. With the Google channel, you can run Google Shopping campaigns and list your products for free in the Shopping tab in Google search results.
- Buy button. If you have an existing website or blog where you want to sell your products, you can install the Buy button sales channel to embed your products onto another webpage, allowing customers to purchase them and check out there. You can even create checkout links to send directly to a customer and have them jump straight to checkout.

You can quickly add sales channels by clicking the + button next to Sales channels or view our full list of sales channels in the Shopify App Store. Then, on your Product pages under Product Availability , you can choose which products are available on which sales channels.
I'll be considering the Facebook and Instagram channels for sure since a brand like Kinda Hot Sauce will rely heavily on social media marketing.
Customizing your email notifications (optional)
Shopify comes with a series of ready-to-use automated email and SMS notifications to let customers know about order confirmations, status updates, and more.
I'll be leaving them alone for now, but if you need to customize these for any reason—to communicate specific information or simply reflect your brand better—you can edit these notifications under Settings > Notifications .

Setting up your store for marketing
Marketing is different for every business, but regardless of your strategy, it's important to set up the right foundation as soon as you can so you can get the most out of your efforts as you drive traffic to your store.
In particular, I want to cover the fundamentals of nearly every ecommerce marketing strategy that are important to know for new store owners.
Analytics
Shopify Reports (under Analytics > Reports ) not only helps you monitor traffic and sales generated by your store across all your sales channels but also serves as a treasure trove of great insight for improving your business over time.
You can learn where your traffic and sales are coming from, your overall online store conversion rate, traffic and sales over time, and more.

For more granular analytics and flexible reporting, you can set up Google Analytics for free.
Facebook pixel
Have you ever visited an online store, considered a product, but left without buying it, only to see an ad for it a few days later? Or have you ever seen an ad for a product from a business you'd never heard of that seemed like it was made for you?
That's made possible through something called the Facebook pixel, an intelligent code that learns from how people interact with your brand and your website—from liking your social media posts to making a purchase—and makes it possible to personalize how you advertise to them over time.
The Facebook pixel learns from all the traffic you send to your online store, so if you plan on advertising on Facebook or Instagram at any point in the future, it's important to have your Facebook pixel set up.
You can get clear instructions on how to set it up for your Shopify store by using our free Facebook Marketing app (note that this process will require you to also set up a Facebook page and ad account for your business).
Search engine optimization (SEO)
Many shoppers turn to Google and other search engines as part of their purchasing journey, whether it's to find a product they saw or heard about through a friend or they're conducting some comparison shopping for a purchase.
Helping your online store's pages and your products appear in these search results can create passive streams of relevant traffic for free. However, it takes time to grow this source of traffic.
You can lay the right foundation through a practice called search engine optimization (SEO), which we were first introduced to when we set up our Products and Pages in our store.
Another area of your store where you'll want to keep SEO in mind is the Title and meta description fields, which can be found under Settings > Preferences . For Kinda Hot Sauce, I want to make sure I include my brand name and a description of what my business is about, based on the keywords people might search for to find my business.
You can use a free keyword research tool like Ubersuggest or Keyword Surfer (Chrome extension) to estimate how many times people search a specific query in a month and what types of searches happen around that keyword. Estimated monthly search volumes aren't always 100% accurate and the more popular a search is, the more competitive it usually is.
Always remember that the job of a search engine is to show the most relevant results to the user, so you should try to prioritize keywords that are directly relevant to your business.
Let's take Kinda Hot Sauce as an example to illustrate some of the key findings that can come out of even the simplest keyword research:
- “Medium hot sauce“ and “mild hot sauce” come up with 480 and 40 estimated monthly searches, respectively. Since they relate closely to what my business is about, I can prioritize them in my homepage title and description.
- Many people also search for a variety of recipes for spicy foods (eg, “how to make crispy hot wings”), meaning I could introduce a blog later on to create content around searches related to recipes that involve hot sauce.

While I'm here, I'm also going to add a Social sharing image to make sure that I create a strong first impression whenever a link to my store is shared on social media or in direct messages.
Recommended: Check out our SEO checklist for other steps you can take to help your store show up in relevant search engine results.
8. Launch your store
I'm finally ready to launch! Is my store perfect? No. But I feel good enough about it to bet time and money marketing it and learning from the feedback I get to make it even better over time.
I can remove my password page (under Settings > Preferences ) and start telling the world I'm open for business.
The journey ends here for this demo store. But it's just beginning for you. Here are some next steps and resources to help you ramp up your business after launching:
- Drive traffic to get your first sales
- Learn from your traffic
- Optimize your store
Illustration by Marina Verdu
Frequently asked questions about starting an online store
Can I start an online store with no money?
The lowest cost business models are dropshipping or print on demand but an online store is needed to sell products. You can get a Shopify subscription for as little as $1 a day. It is difficult to start a business with no money.
What can I sell online to make money?
You can sell anything from handmade products, courses, graphic design services, custom printed t-shirts and other apparel, home-baked items and more.
How do I start an online store?
Set up an online store on an ecommerce platform like Shopify, add the products you want to sell, create key pages for your store, pick a theme and customize your online store, customize your shipping settings, configure your tax settings, set up your payment gateway and payouts, prepare your store for launch, and then launch and start marketing your store.
Is online selling profitable?
Yes, it is profitable to be an online seller today. More than 50% of consumers today choose to purchase their day-to-day necessities online. Selling for a profit includes finding your niche, attracting ideal customers, and marketing products with a price tag customers are willing to pay that have a good profit margin.
How to start an online store without inventory?
You can start an online store as a dropshipper or print on demand seller which requires no inventory to get started.